Question
Blackmagic Cloudの利用方法を教えてください。
Answer
Windowsとmacが共存する環境で、データの受け渡しは、手動で同期する構成で説明いたします。
データ受け渡しで、「DropBox」や「google Drive」などのサービスを利用して、自動同期される場合は、「DropBox」や「google Drive」などのクラウドのサーバーと自動同期させているフォルダを後で説明している同期フォルダと同様に設定することで利用可能です。
利用開始までのサーバーの準備は、次の記事を確認ください。
Blackmagic Cloud のDaVinci Resolve Project Serverの使い方
準備
プロジェクトの設定
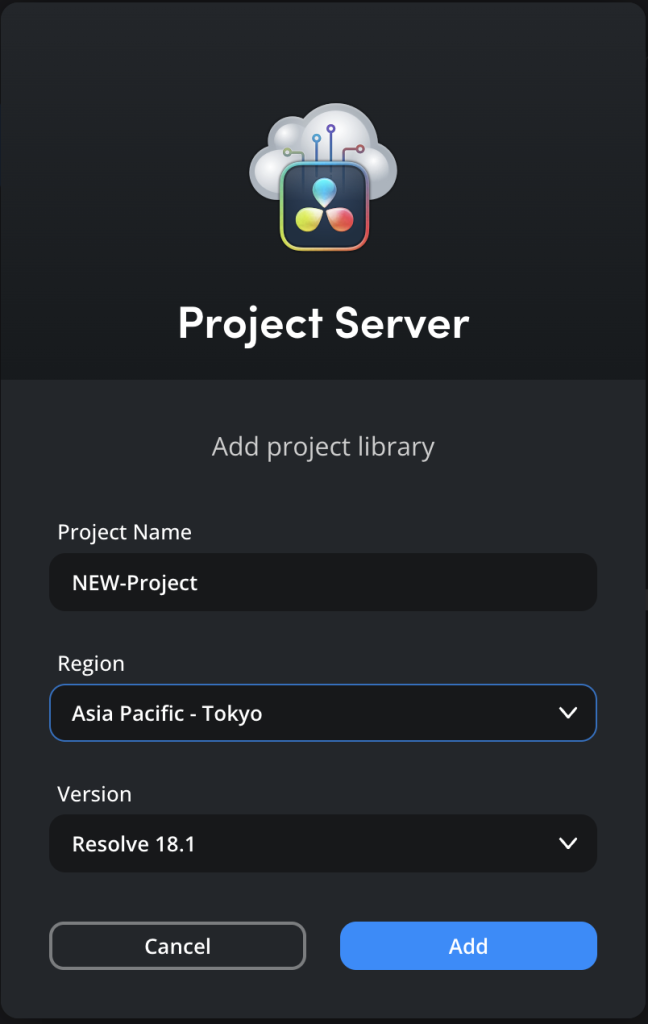
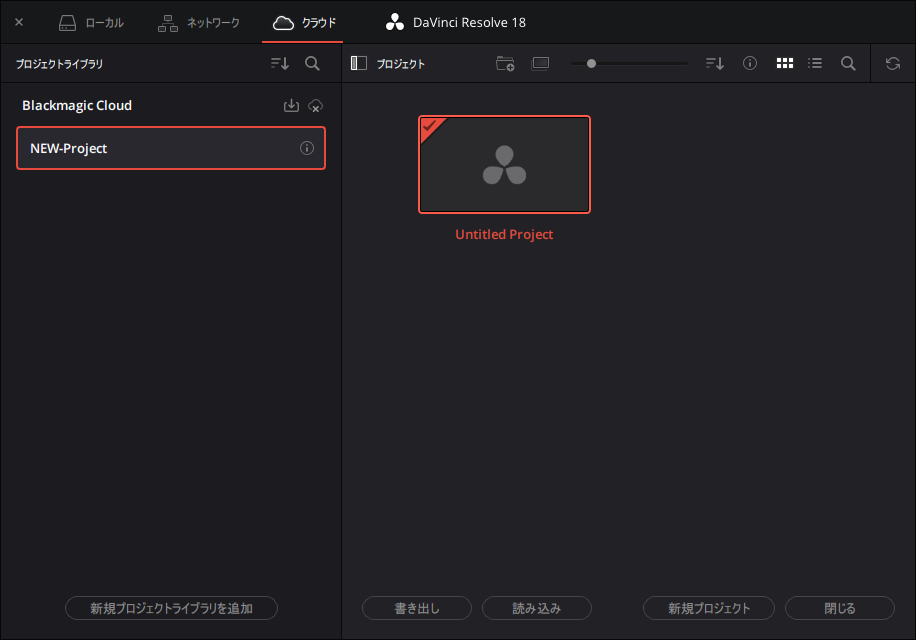
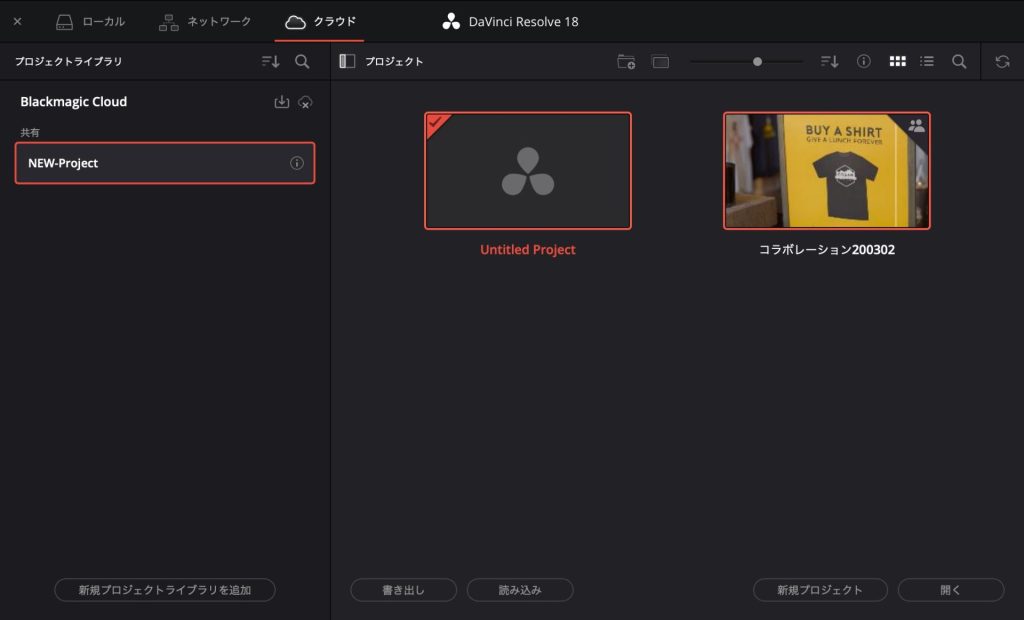
「NEW-Project」と言う名前で作成しました。
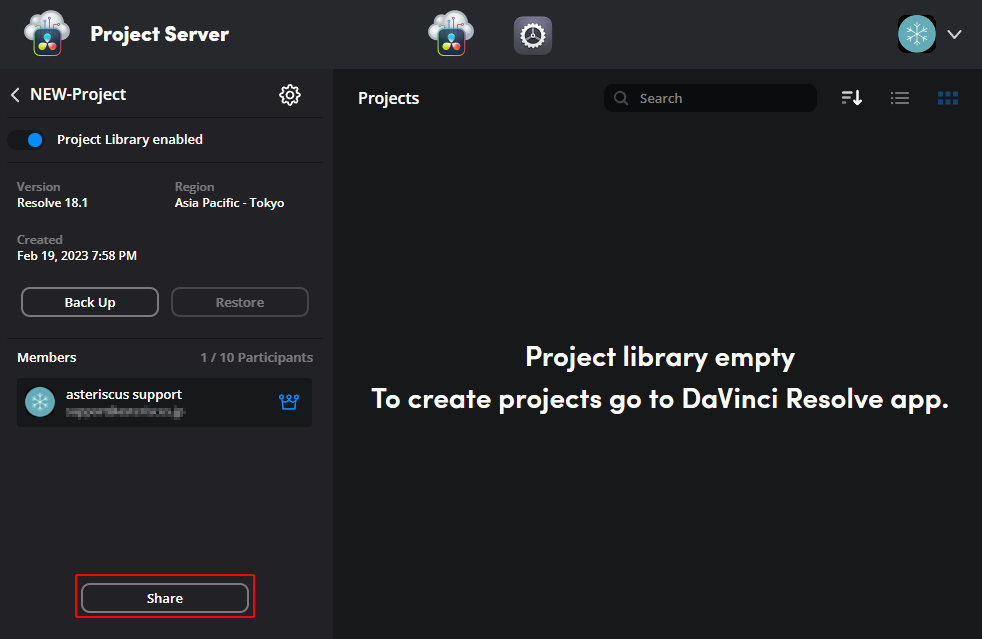
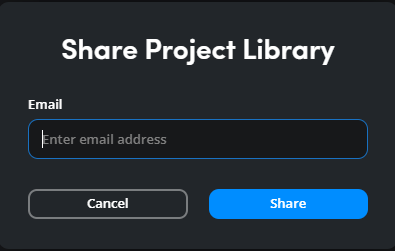
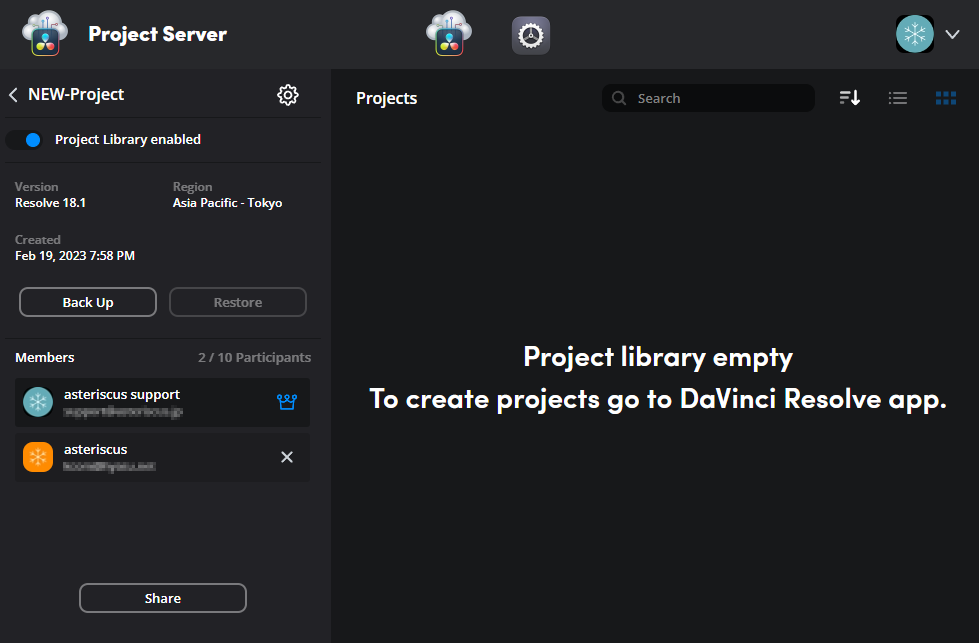
Shareを押すと、共有相手に利用が可能になった旨のメールが届きます。
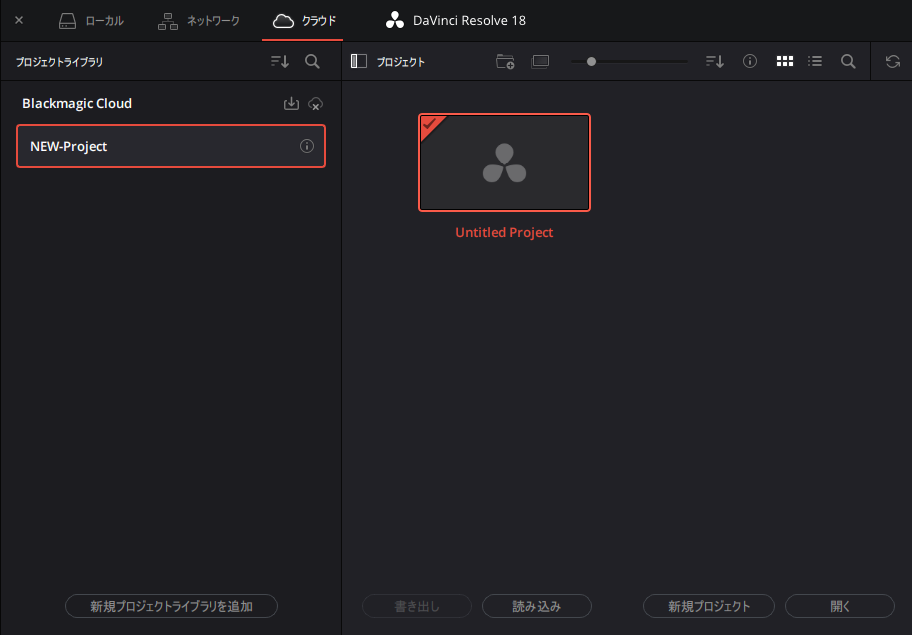
クラウド上にプロジェクトを作成する
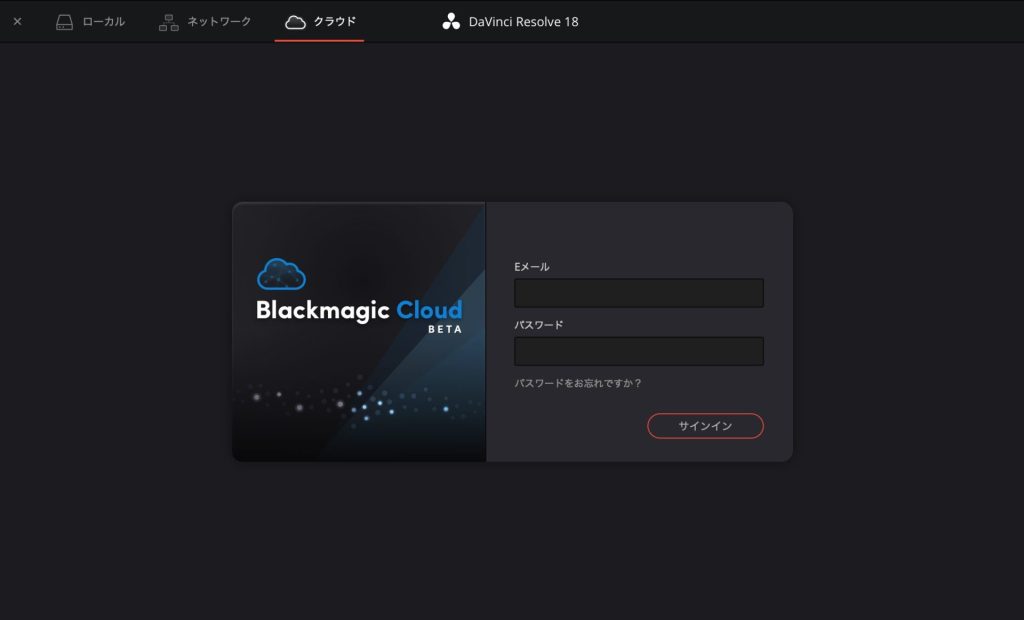
「プロジェクトマネージャ」で「クラウド」を選択し、サインインをします。

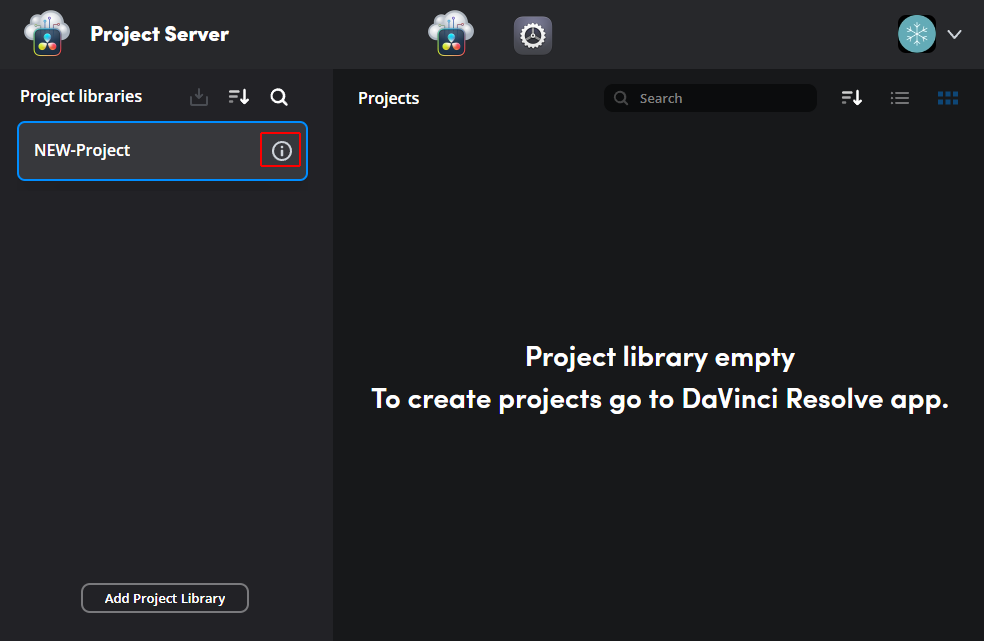
サインインすると、ブラウザ上で作成したプロジェクトライブラリが表示されます。
==補足===
後で、手順を追って説明しますが、つまづきやすいポイントなので、事前に説明します。
このタイミングではまだコラボレーション機能を有効にするメニューが表示されません。
一旦なんらかの方法で保存したプロジェクトを開いている状態にすると、このように選択が可能になります。
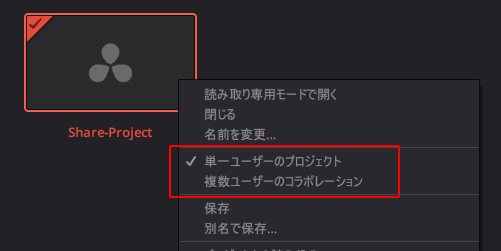
わかりにくいですが、これは、コラボレーション機能を有効にする前に、管理者が素材の整備などの事前準備をすることを想定しているための挙動だと思われます。
==補足ここまで===
今回は、一度準備が整ってから、コラボレーションの機能を有効にする手順で説明します。
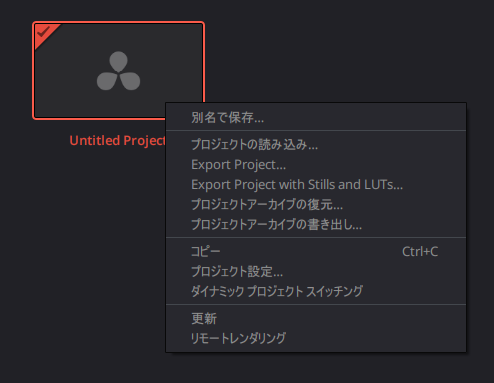
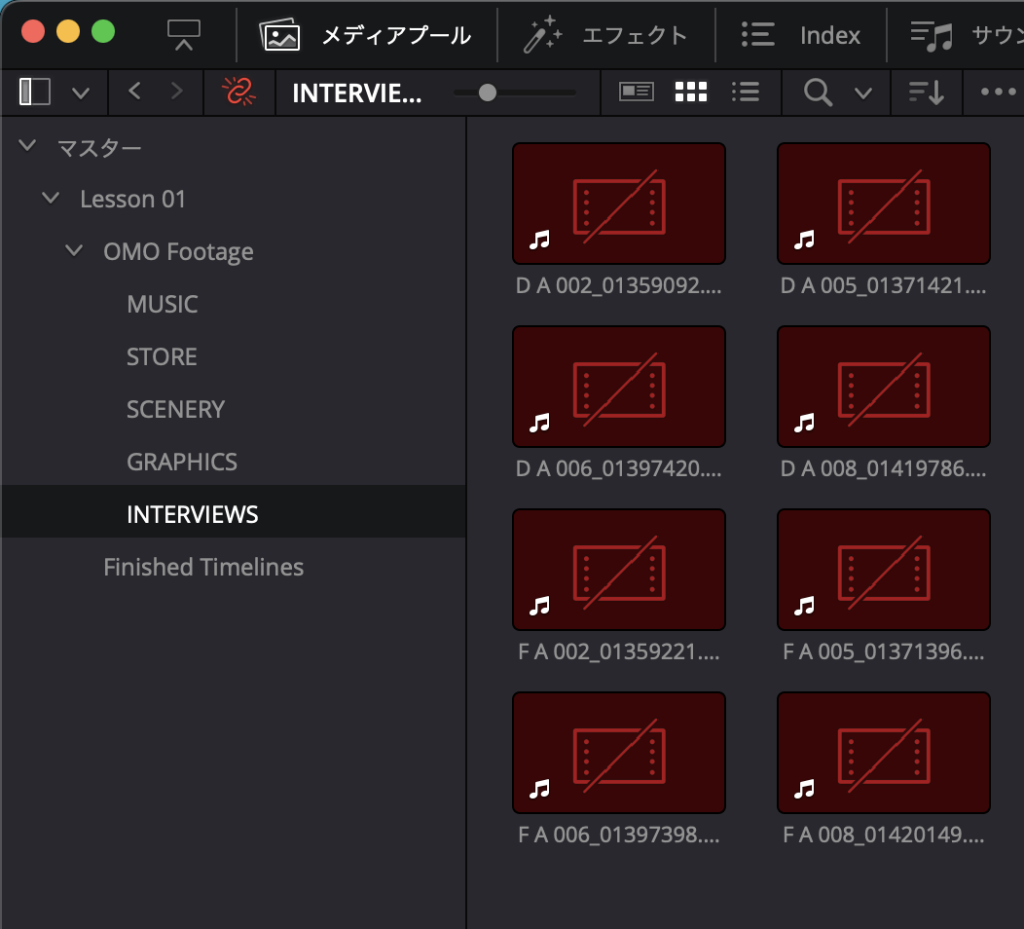
一旦「Untitled Project」をそのまま開き
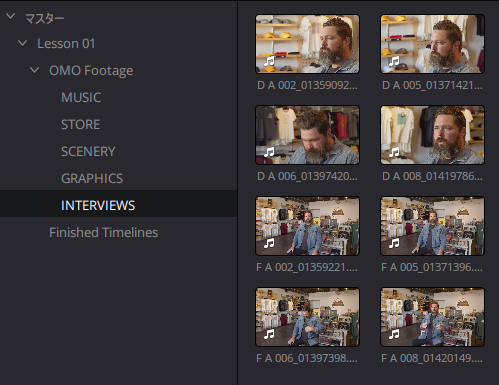
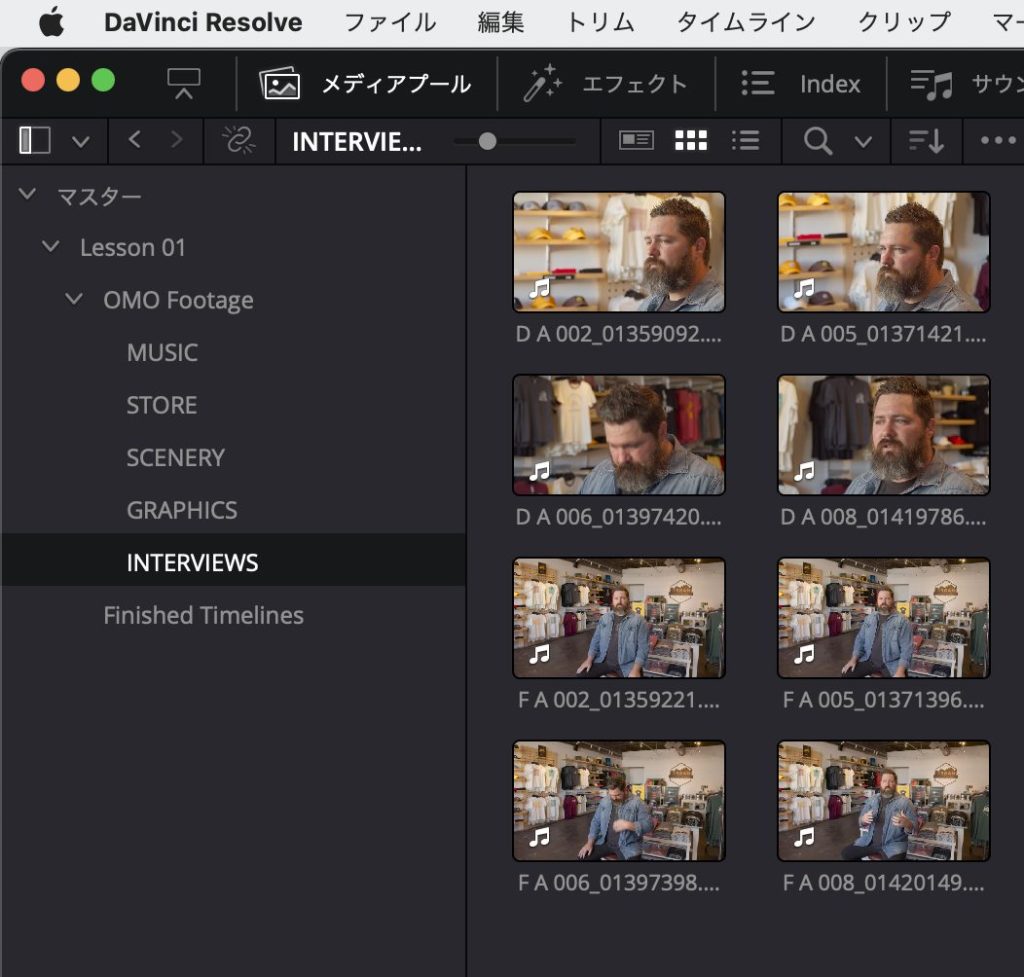
今回利用する素材をメディアプールに追加します。今回の例では、次のフォルダをメディアプールにドラッグして追加しました。
D:\Windows環境\2月プロジェクト\R17 Beginners Guide lessons\Lesson 01
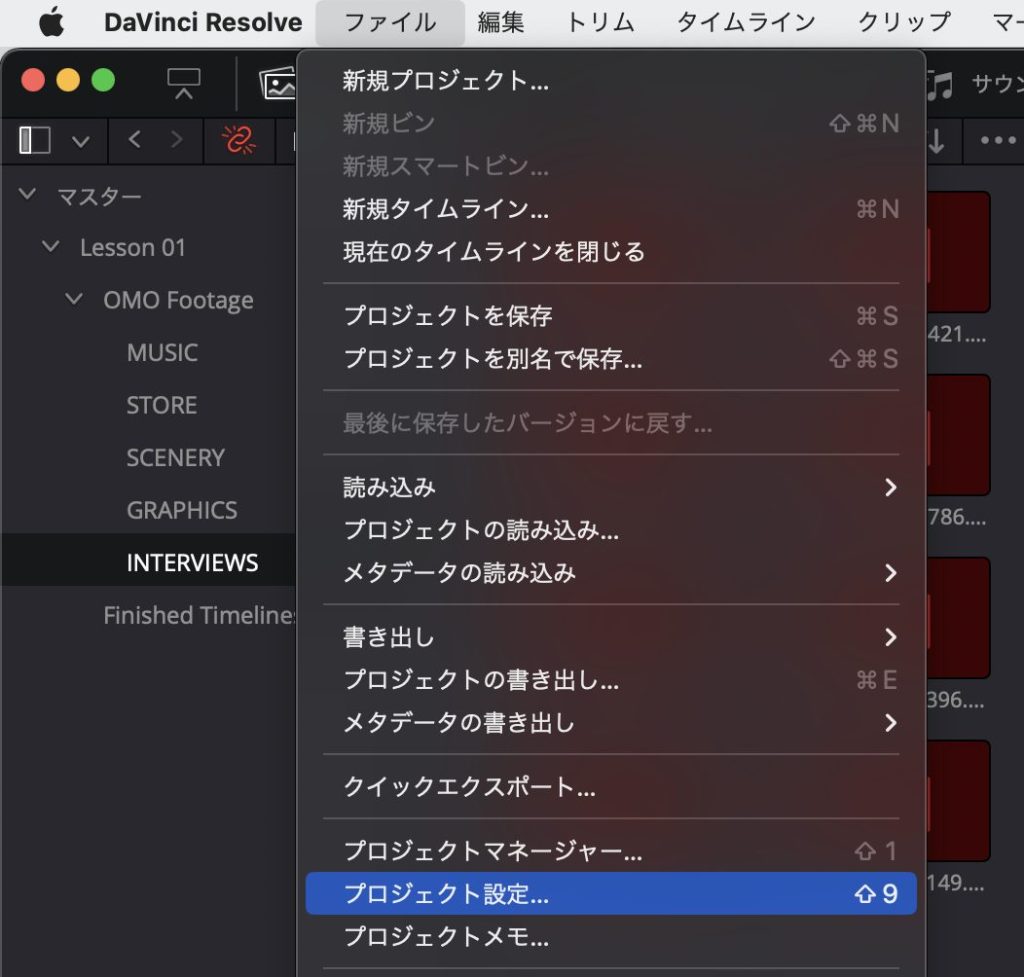
続けて、他のPCで開いた際に、自動で他のPCからアクセスできる範囲にあるファイルを参照できるように、パスマッピングの設定を準備します。
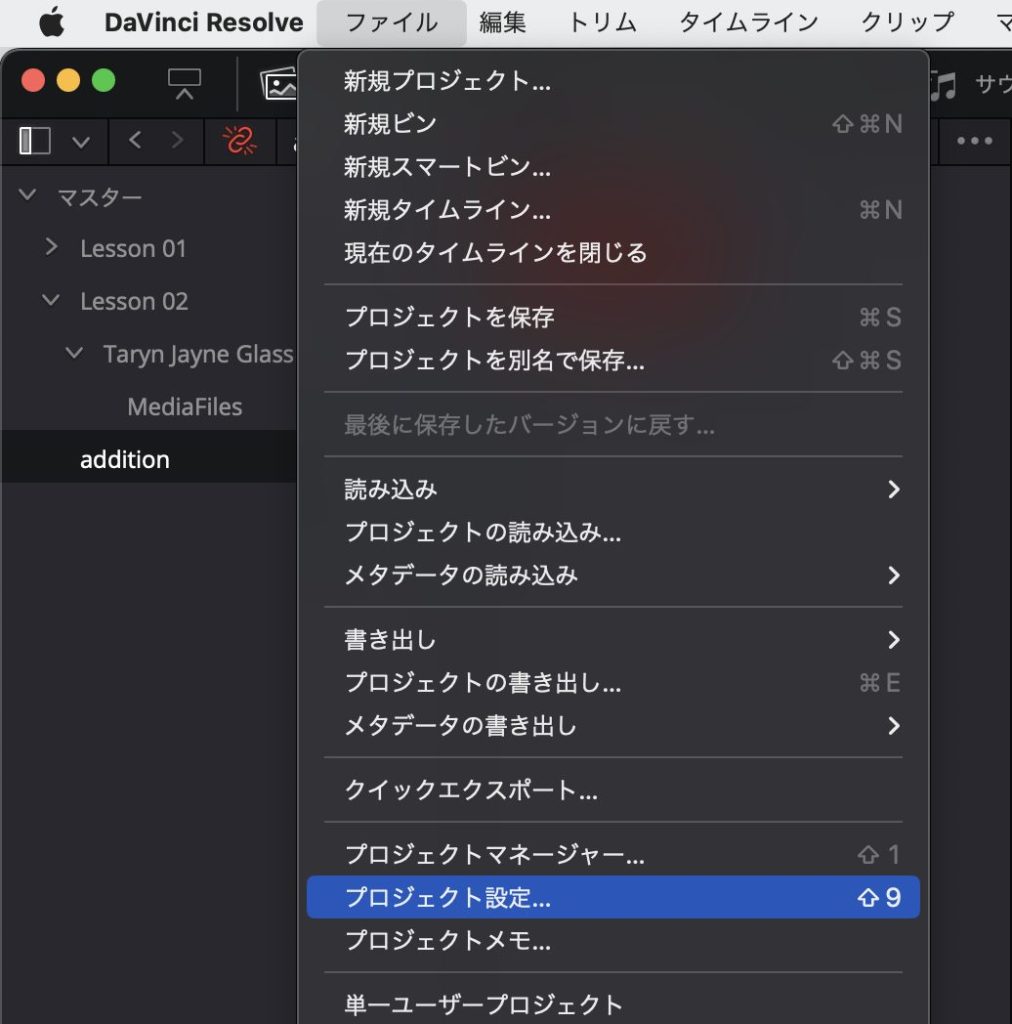
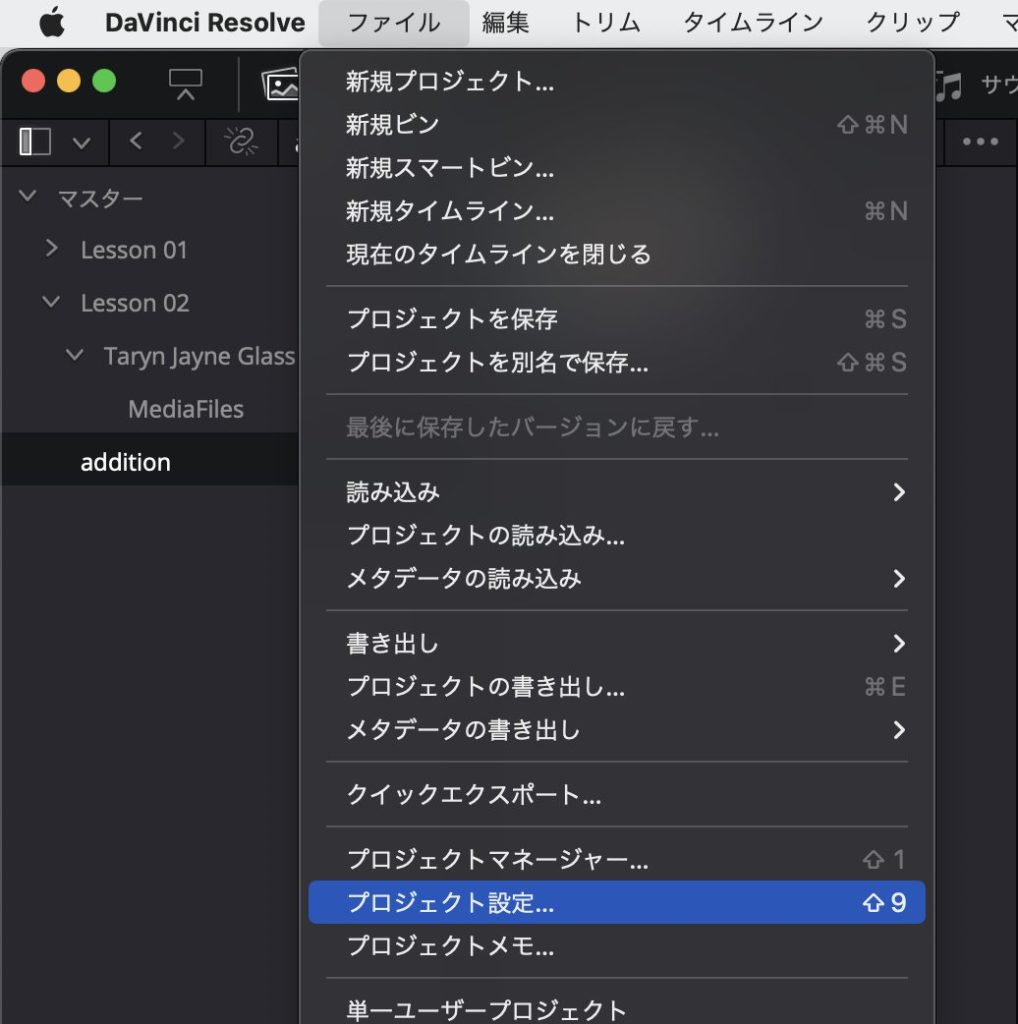
[ファイル]-[プロジェクト設定]を選択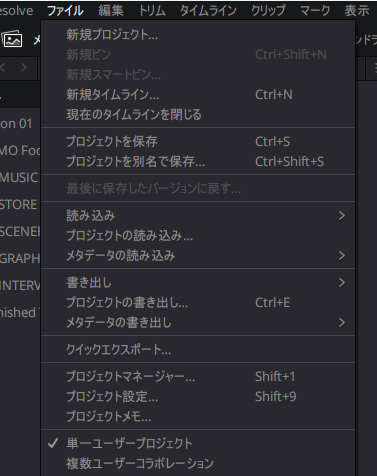
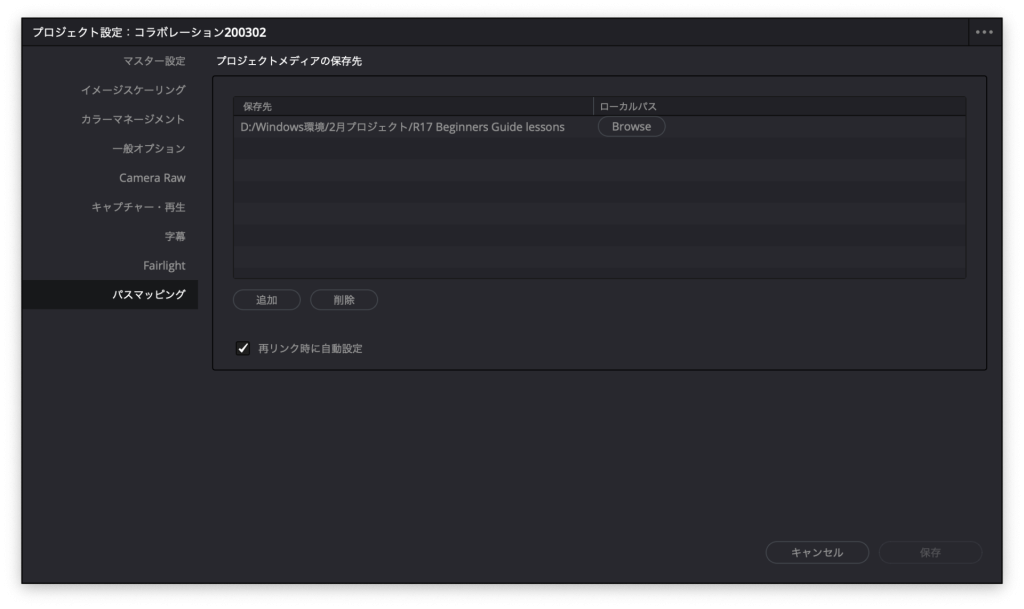
「パスマッピング」タブで<追加>を選択
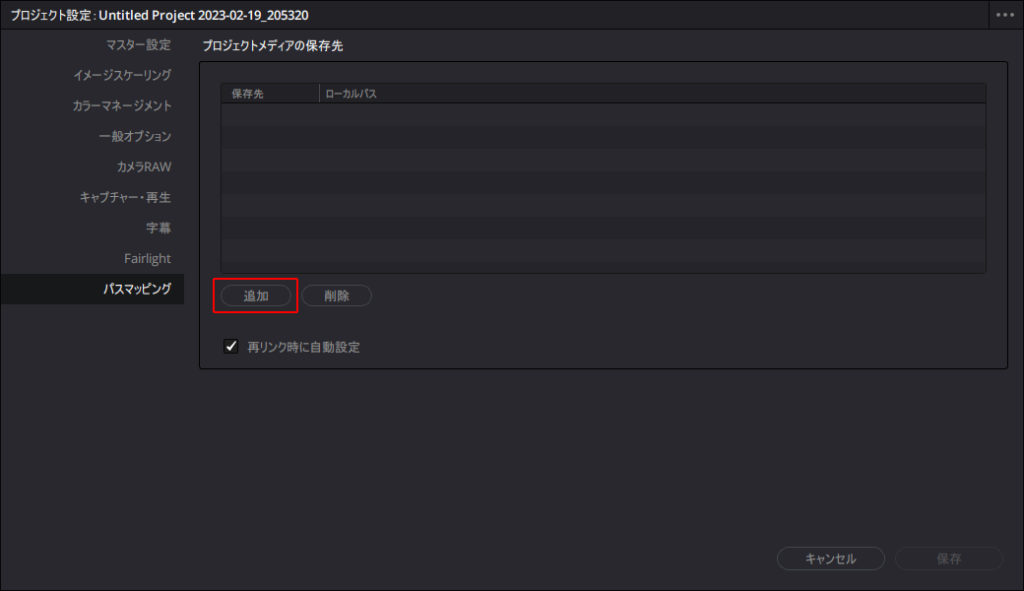
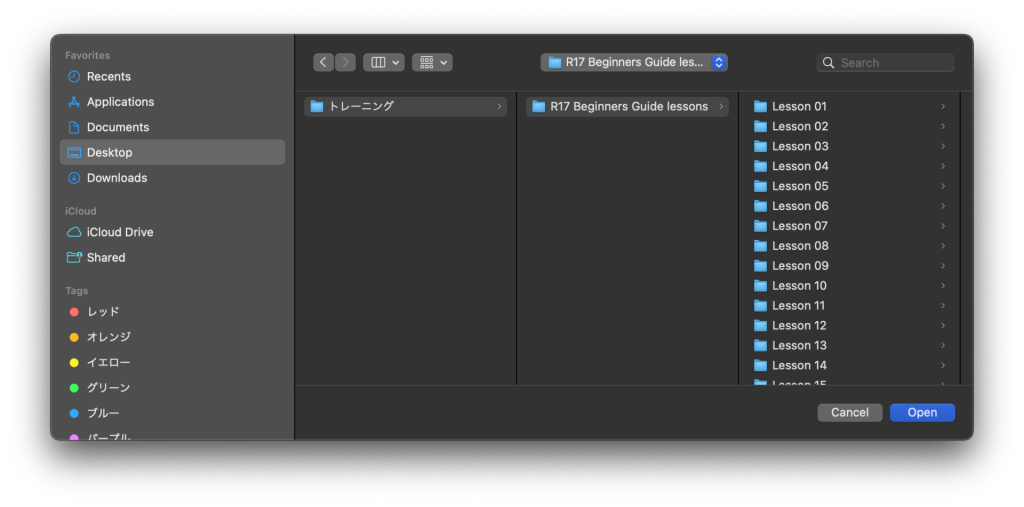
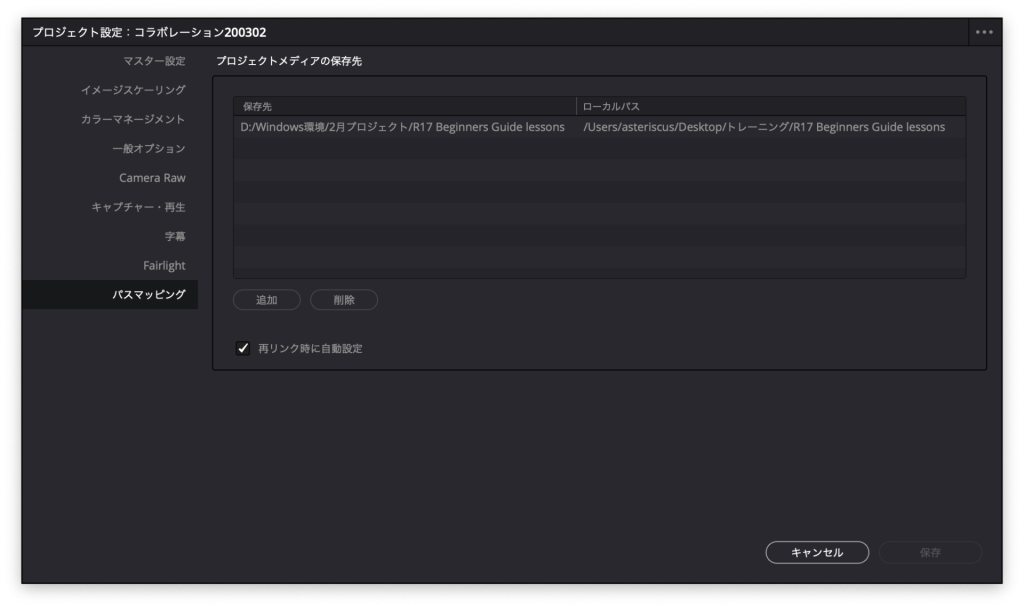
どのフォルダを保存先として設定するかを選択します。
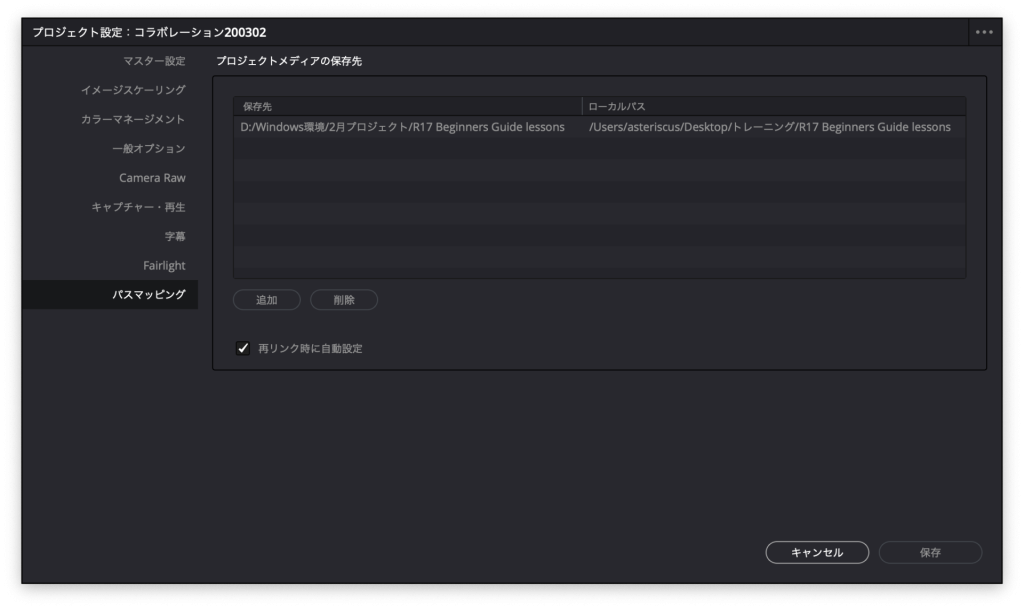
この例では、「D:\Windows環境\2月プロジェクト\R17 Beginners Guide lessons」を選択しました。次のように情報が登録されるので、確認したら<保存>
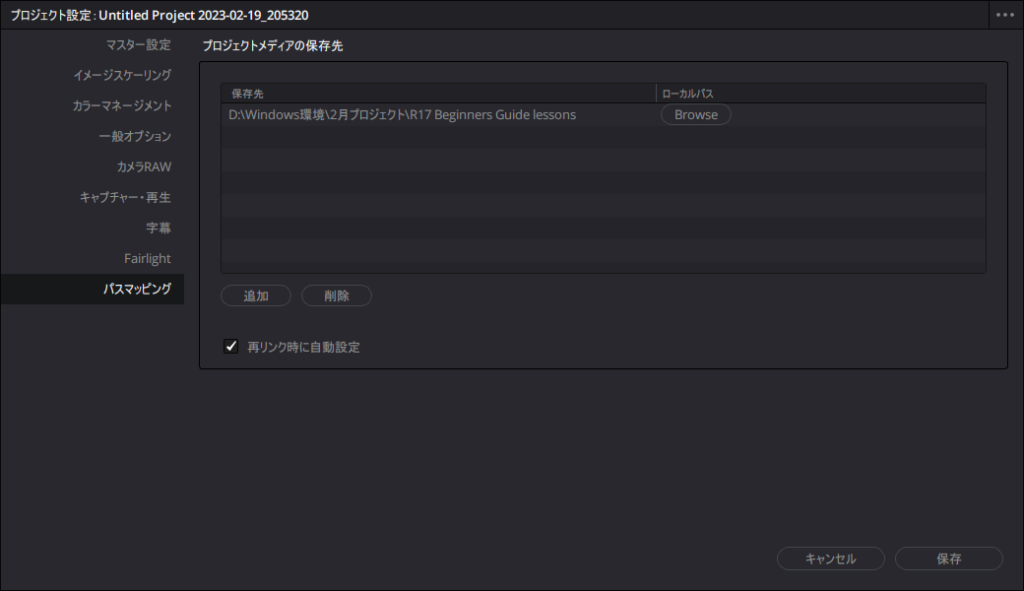
「保存先」のパスフォルダ(ディレクトリ)を「ローカルパス」で置き換えるといった設定なのですが、現時点では置き換えが不要なので、このままで保存して構いません。
A,B,Cと3つの環境で、それぞれがデータを追加して運用するような場合、それぞれがそれぞれに対して設定をする必要が発生しますが、今回は最も単純な構成を例に挙げています。(さらにいうと、同じフォルダ構成がフォルダのトップから一致する環境であれば、パスマッピングが不要になります。)
例:
| 設定PC | 保存先 | ローカルパス |
| A | Aのパス | |
| Bのパス | B用のローカルパス | |
| Cのパス | C用のローカルパス | |
| B | Aのパス | A用のローカスパス |
| Bのパス | ||
| Cのパス | C用のローカルパス | |
| C | Aのパス | A用のローカスパス |
| Bのパス | B用のローカルパス | |
| Cのパス |
(少々雑ではありますが、、、)これでデータとパスマッピングな準備ができたものとして、次は、コラボレーション機能を有効にします。
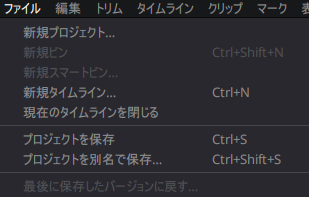
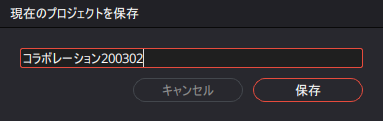
一度、プロジェクトを保存します。Ctrl+Sまたは[ファイル]-[プロジェクトを保存]を選択
適当な名前を設定して<保存>
プロジェクトを右クリックして、<複数ユーザーのコラボレーション>を選択
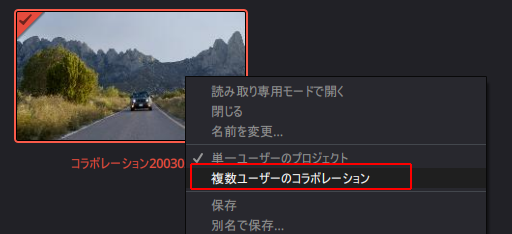
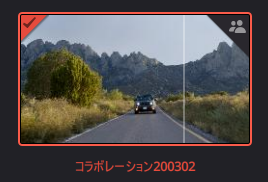
右上にコラボレーションが有効になっていることがわかるマークが付きます。
これで準備完了です。
他のPCでの設定
次に、他のPCでの設定を実施します。
プロジェクトマネージャーでサインインをします。
既に保存されているものが表示されます。
ただ、「コラボレーション200302」を開いても、リンク切れが発生します。これはこちらのPCでのパスマッピングの設定が完了していないためです。
「パスマッピング」タブを開くと、元もPCで設定した「D:\Windows環境\2月プロジェクト\R17 Beginners Guide lessons」が保存先に表示されます。これに対応するローカルパスを指定します。「Browse」を選択
対応するパスを選択します。
ポイント!!!この際、元のフォルダ「保存先」の一番下の階層と、新しく設定するローカルパスの一番下の階層の名前は一致させておく必要があります。
保存
すると、このようにリンク切れが解消されます。
これを保存し、元のPCで開いても、元のPC側ではパスマッピングで置き換えては表示しないため、問題なく開くことができます。
パスマッピングを意識しない方法
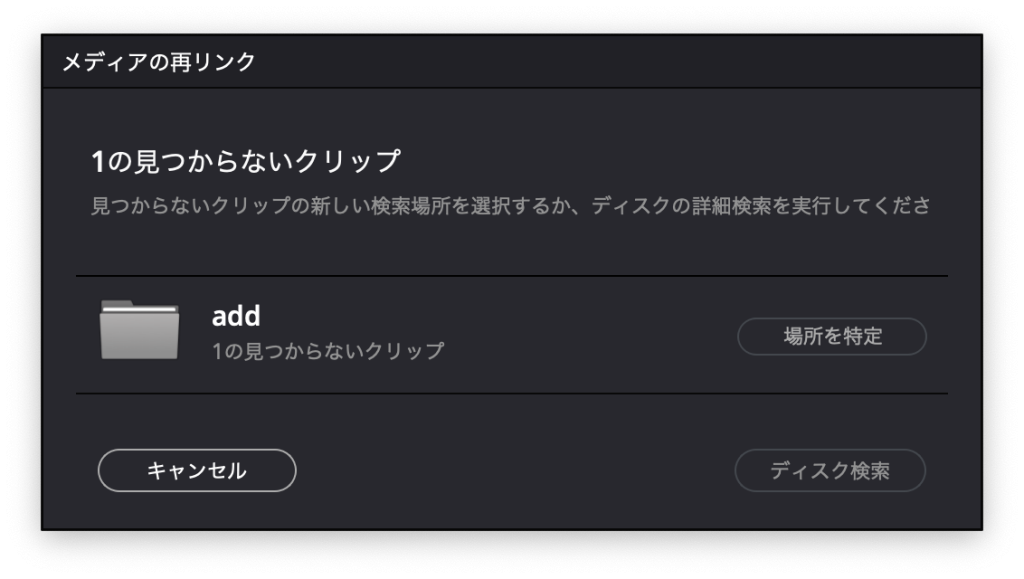
「メディアの再リンク」を実施することで、パスマッピングを自動設定することも可能です。ただ、この方法の場合、パスマッピングが自動で設定されない場合が確認されています。(どういった時に問題になるか確認中です。)
編集の現場にもよりますが、プロジェクト単位でファイルをまとめて「パスマッピング」を手動で設定する運用がお勧めです。「メディアの再リンク」を利用すると、編集中の素材の場所が分散している場合に都合がよいかもしれませんが、結果的にどこに何があるわからなくなるので、「パスマッピング」での運用がお勧めです。
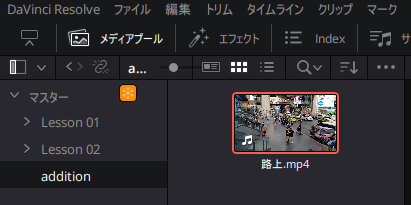
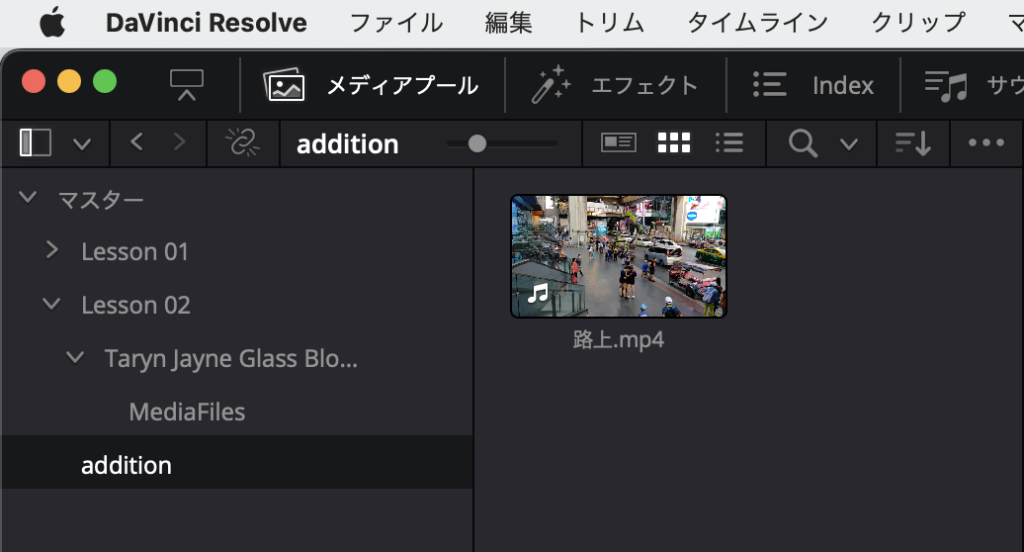
次のフォルダに「路上.mp4」を保存し、それを
D:\Windows環境\add
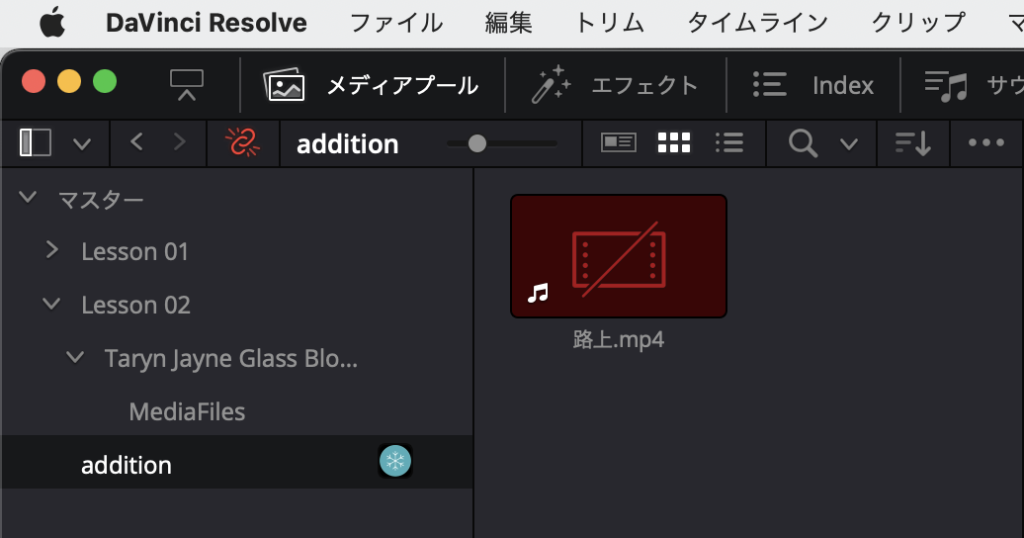
この時点では、
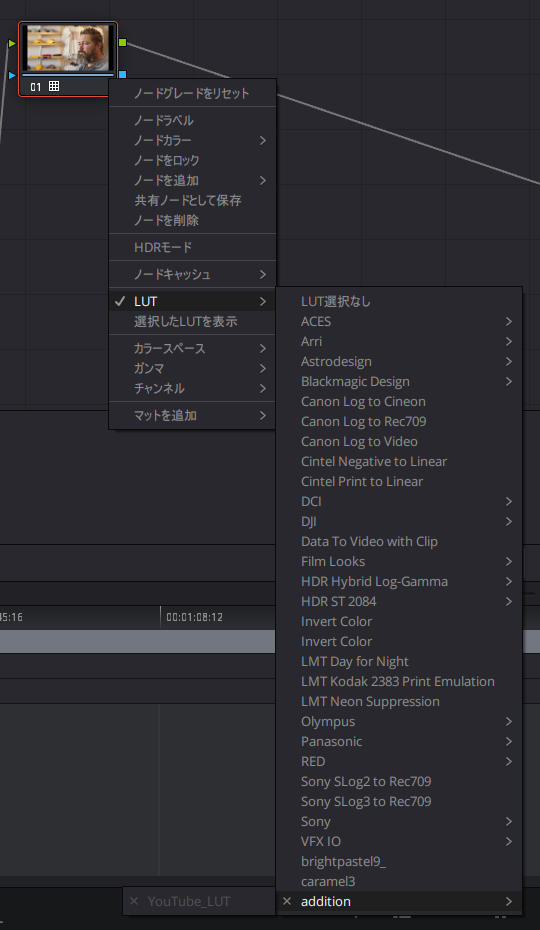
LUTの設定
参加する環境で、利用するDaVinci Resolveで管理しているLUTフォルダ以下の階層を揃えておく必要があります。
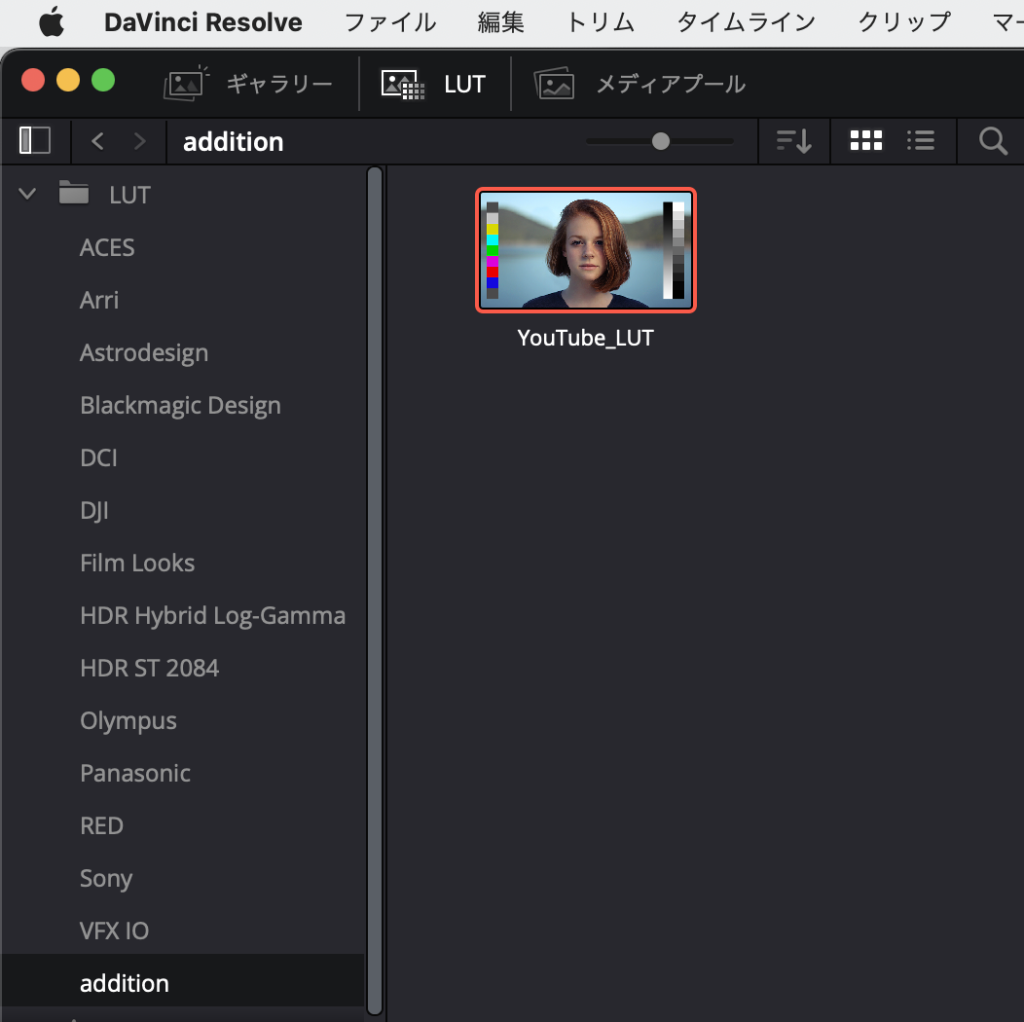
例えば、こちらのPCではadditionに「YouTube_LUT」があり、それを使う場合で説明します。
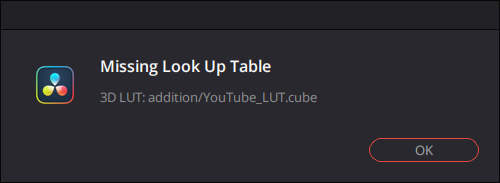
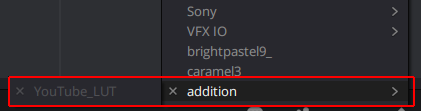
フォルダ階層が合っていないPCで、プロジェクトを開くとLUTが適用できない旨のダイアログが表示されます。
また、LUTを適用したノードでLUTの情報を確認すると、LUT名の横に「×」が付きます。
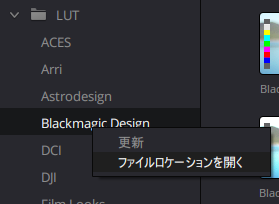
対応方法は、元と同じように保存します。保存場所は、適当なフォルダで右クリックして「ファイルロケーションを開く」(Windows)、「Finderで開く」(mac)を選択
開いたエクスプローラまたはFinderの階層を確認し、「LUT」のフォルダに移動し、その下の階層の位置を一致させます。
Macintosh HD\ライブラリ\Application Support\Blackmagic Design\DaVinci Resolve\LUT\
C:\ProgramData\Blackmagic Design\DaVinci Resolve\Support\LUT\
例えば、「YouTube_LUT」を次のフォルダに保存している場合は、
Macintosh HD\ライブラリ\Application Support\Blackmagic Design\DaVinci Resolve\LUT\addition
他のPCでも次のように揃えたフォルダを追加して、そこに「YouTube_LUT」をコピーします。
C:\ProgramData\Blackmagic Design\DaVinci Resolve\Support\LUT\addition
Macintosh HD\ライブラリ\Application Support\Blackmagic Design\DaVinci Resolve\LUT\addition
DaVinci Resolveを再起動すると、他のPCでもLUTを利用可能になります。(カラーページの「LUT」フォルダを右クリックして、「更新」だけでもよいかもしれません。)
Fusion マクロで利用するメディア インファイル(パスマッピング外のデータがある場合)
#ダビンチリゾルブ ♯DaVinciResolve