Question
2022年11月11日にリリースされたDaVinci Resolve 18.1のアップデート情報を教えてください。
Answer
(有償版のStudioと無償版を分けて記載していないので、一部無償版で制限されているものもあります。)
入手
サポートサイトから入手可能です。

注目点
機能強化、18.0.0~18.0.4までの不具合改修、安定性の向上等、100を超える改善があります。
公式が主な新機能を挙げていますが、利用者としてうれしい機能強化3つを上げるとしたら、次の3点でしょうか。(当然その他のものも魅力です。)
- 複数のツールで性能が大幅に向上
内部処理のアップデートにより、テキスト+が最大10倍速
スタビライゼーション、フェイス修正のトラッキングおよび分析が5倍速
空間的ノイズ除去が4倍速 - Studio(有償版)でサポートされる DaVinci Neural Engine による新しいボイスアイソレーションで録音された音声から不要な音を除去に対応
- 編集ページでのスピードエディター機能の向上
マルチカム切り替え、オーディオレベル、イン点/アウト点のトリムなど、DaVinci Resolve Speed Editorの機能がエディットページに追加
アップデート内容の概要の説明は公式の動画が参考になります。
2023/1/24に公開された日本語の詳細説明
18.1提供開始のタイミングで公開された英語の説明
DaVinci Resolve 18.1の変更点
(以下は公式の資料を機械翻訳したものです。)
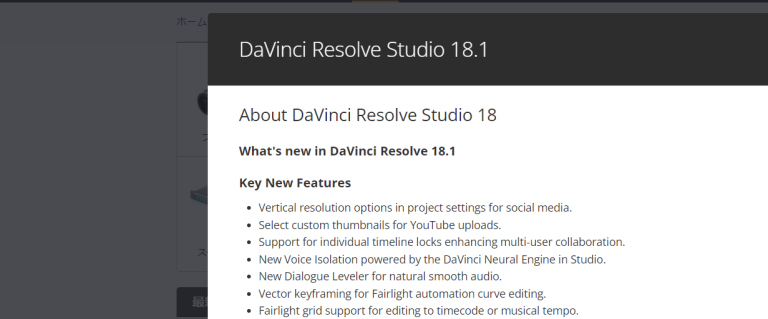
主な新機能
- ソーシャルメディア用のプロジェクト設定に垂直解像度オプションを追加。
- YouTubeアップロード用のカスタムサムネイルを選択可能。
- マルチユーザコラボレーションを強化する個別タイムラインロックに対応
- Studio の DaVinci Neural Engine による新しいボイスアイソレーション。
- 自然でスムーズな音声を実現する新しいダイアログレベラー
- Fairlightオートメーションカーブ編集のためのベクターキーフレーム機能
- タイムコードや音楽のテンポに合わせて編集するためのフェアライトグリッドのサポート
- 再編成され、合理化されたビューメニュー
- 編集タイムラインでのResolve FX Dust Busterのサポート
- 編集ページでのスピードエディター機能の向上。
- 字幕キャプションのプロパティを個別にオーバーライドできるようになりました。
- 字幕トラックプリセットとトラックごとのフォーマットルールに対応しました。
- Fusion ページで Magic Mask をサポートしました。
- Dolby Vision シネマトリムをサポートしました。
- Windows と Linux での分数表示スケーリングに対応しました。
メディア
- スマートビンをサポートし、個々のマーカークリップリストを表示できるようになりました。
- ビューアでマーカーにナビゲートすると、マーカーが選択されるようになりました。
- ソースビューアのアクションで前または次のクリップをロードできるようになりました。
- キーワード、ショット、シーンを適用するためにメディアエントリをオートスマートビンにドラッグ。
エディット
- 編集画面でのスピードエディター機能を改善しました。
- フルスクリーン表示、タイムラインリサイズ、レビュー再生キー
- 編集タイムラインでのトリム、ロール、スリップ編集、クローズアップの挿入
- CUT、DIS、SMTH CUTキー
- 編集タイムライン上のクリップのオーディオレベル変更
- SETキーによるトランジション時間の初期設定
- シンクビン、カム1-9キーによるマルチカムクリップのアングル変更
- サブタイトル機能の改善
- 字幕のキャプションプロパティを個別にオーバーライドできるようになりました。
- HTMLの太字と斜体の字幕の扱いが改善されました。
- 字幕トラックプリセットとトラック毎のフォーマットルールのサポート。
- 複合クリップとトランジションでのアルファの扱いが改善されました。
- トランジションの複数選択、削除、再調整。
- ギャップに対する編集とトリムアクションをサポート
- タイムラインページのスクロールに対応
- すべてのオーディオトラックのデスティネーションを有効/無効にするショートカット。
- 新規トラックは編集タイムラインのコンテキストに追加されるようになりました。
- 編集タイムライン上でResolve FX Dust Busterを使用できるようになりました。
- 編集インデックスにマーカーとトラックリストを追加できるようになりました。
- スピード変更ダイアログにソースクリップのデュレーションが表示されるようになりました。
- ビンからの再変換は選択されたビンをセッションに保持します。
- 対応する Fusion エフェクトのインスペクタにメディアをドラッグ&ドロップできるようになりました。
Fusion
- Fusion アクションのキーボード設定を統合
- Fusion ページで Magic Mask をサポートしました。
- Resolve FX Keyers、Dust Buster、Lens Flare、Stop Motion のサポート。
- 編集トラック合成にアクセスするための新しいメディアインバックグラウンドモード
- Text+の再生とレンダリングパフォーマンスを最大10倍高速化
- 共通のキーワードとカテゴリーを使ったFusionノードの検索
- GPUアクセラレーションによるVariBlurの高速化
- GPUアクセラレーションによるFilmGrainの高速化
- FusionページでARRI LogC4とARRI Wide Gamut 4をサポート。
カラー
- 生成された空のテクスチャを含む新しいResolve FX Sky Replacement。
- Resolve FX Surface Tracker を使ったテクスチャのモーションブラーに対応。
- グレードの分離にResolve FXアルファを使用できるようになりました。
- Resolve FX Film Grainにおける個別のRGBコントロールのサポート。
- Dolby Vision シネマトリムのサポート
- Resolve FXを使ったカラーグレーディングノードは自動的に追加入力を取得。
- サポートされているResolve FXのアルファチャンネルをカラーで処理することができます。
- トラッキングがトランジションエクステント上で機能するようになりました。
- マルチカムおよび複合クリップのリサイズ品質の向上。
- プロファイルまたはパーシャルオクルージョンの顔をトラッキングする際のクオリティを向上。
- Resolve FX Face Refinementの目のシャープ化動作の改善。
- DaVinci Resolveのアドバンスパネル機能の改善。
- グループ化されたクリップのクリップとタイムラインのトグルを改善。
- ポットモードにプライマリコントロールが追加されました。
- 修飾子メニューの改善。
- パワーウインドウメニューの改善。
- シフトダウン+ループでプレイヘッドモードが切り替わります。
- リファレンスワイプモードをサイドパネルにドッキングさせることができるようになりました。
- DaVinci Wide Gamutを使用したRCMプロジェクトにおけるText+の取り扱いを改善。
- ビデオレベルスコープにおけるHDR、分割、パーセンテージのラベリングを改善。
- オブジェクトマスクでクリップをフィルタリングする機能。
- クリップの色でクリップをフィルタリングする機能
- エフェクトインスペクタに明示的な削除アイコンが表示されるように。
Fairlight
- StudioのDaVinci Neural Engineを利用した新しいボイスアイソレーション。
- 自然でスムーズな音声を実現する新しいダイアログレベラー
- タイムコードや音楽のテンポに合わせたグリッド編集のサポート
- オートメーション編集とコントロールの大幅な向上
- ベクトルキーフレームによるオートメーションカーブの編集
- 新しいスナップオートメーショングライド時間の設定
- オートメーションがクリップ編集にデフォルトで従うようになった
- オートメーションが現在の再生ヘッド位置と一致するように更新される
- オートメーションをタイムラインの開始、終了、すべてに書き込めるようになった
- オートパンチ、オートセーフ、ゾーン、ニューミックスの新しいコントロール
- クリップ間のオーディオクロスフェードをギャップで作成する機能
- Fairlight タイムラインでのペーストインサートとリップルカットアクションのサポート。
- 隣接するトラックに対する複数のトラック名のペーストに対応。
- 範囲選択の開始と終了にビューを配置できるようになりました。
- チャンネルごとに1つのトラックをレンダリングすると、オーディオチャンネル名がサフィックスされるようになりました。
- ミキサーとメーターにツールチップの名前が表示され、パッチが見やすくなりました。
- アサインやオートメーションのバスを削除する時の確認ダイアログ。
- バスフォーマットダイアログから複数のバスを削除できるようになった。
- ADRの使い勝手を改善
コーデックとI/O
- YouTubeアップロードのカスタムサムネイルを選択します。
- YouTubeのプリセットで、サポートされているコーデックのビットレートを選択できます。
- ソーシャルメディアにアップロードする前にレンダリングしたクリップを確認するオプションを追加
- AAFの読み込みと書き出しでタイムラインマーカーをサポート
- DropboxとDropbox Replayのアップロードにカスタムプリセットをサポート
- 最適なH.264/H.265エンコーダを自動的に選択します。
- Dolby Vision H.265プロファイル5クリップのデコードをサポートします。
- サポートされているNvidiaシステムでAV1エンコードをハードウェアで加速。
- 出力解像度のスケーリングにおけるUHDとDCIプリセットのサポート。
- IMF ワークフローにおけるタイムラインマーカーの読み込みと書き出しのサポート。
- IMF配信ワークフローにおけるマルチチャンネルオーディオメタデータの改善。
パフォーマンス
- エンハンストモードでのオプティカルフローパフォーマンスを最大2倍高速化。
- Text+の再生とレンダリングパフォーマンスが最大10倍速に。
- Apple シリコン上の RCM のパフォーマンスが向上。
- Face refinementのトラッキングと解析が最大5倍高速化。
- Resolve FXのオブジェクト除去パフォーマンスを最大5倍高速化
- Apple製シリコンでのシャープなリサイズパフォーマンスを最大2倍高速化
- 空間ノイズ除去性能を最大4倍高速化
- テンポラルノイズ低減のパフォーマンスを最大30%高速化
- ビデオスタビライゼーションパフォーマンスを最大5倍高速化
- 大規模なノードグラフの再生パフォーマンスを高速化
- Apple シリコンにおける PIZ EXR のデコード性能を最大 2 倍高速化。
- Apple シリコンにおける RAW デコードのパフォーマンスが向上。
- 8K H.265クリップのNvidiaアクセラレーションによる再生が最大30%高速化。
- デュアルNvidiaエンコーダによるAV1およびH.265のエンコードが最大50%高速化されました。
- 多くのプロジェクトライブラリを使用するユーザーのために、Macでの起動時間を改善しました。
- Windows IntelシステムでOpenVINOが加速するAIベースのStudio機能。
一般的な機能
- プロジェクト設定にソーシャルメディア用の垂直解像度(縦)オプションを追加。
- マルチユーザーコラボレーションを強化するための個別タイムラインロックのサポート
- ATEMプロジェクトを読み込む際のオーディオ管理の改善
- 3つのドットメニューからアクセスできるプロジェクト設定プリセットの簡素化
- 整理され、合理化されたビューメニュー
- 選択した複数のプロジェクトの書き出しに対応
- プロジェクトマネージャーフォルダのコピー&ペーストに対応
- 書き出されたDRTタイムラインにメディアシンク情報を含めることができるようになりました
- 仮想スライダコントロールの選択時に値をコピー&ペーストできるようになった
- マウスのミドルドラッグでクリップサムネイルをカラーとフュージョンでスクロールできるようになりました
- Windows と Linux での分数表示スケーリングに対応
- クリップの移動、オーディオ録音などのショートカットをカスタマイズ可能
- キーボードカスタマイズでサブメニューの検索が可能
- キーボードカスタマイズのアクションホバーテキストに、アクションの場所を表示
- ショートカットキーの競合を簡単に解決するためのクリック可能な警告表示
- 再生ヘッドでオーディオを現在のトラックにスポットするスクリプトAPIのサポート
- FCPXML ファイルから特定のタイムラインを選択してインポートする機能
- 一般的なパフォーマンスと安定性の向上
編集ページでのスピードエディター機能の改善
編集ページでは、スピードエディターのワークフローが大幅に改善されました。Sync Binボタンはソースビューアをマルチカムモードで開きます。CAMボタンはマルチカムクリップとタイムラインのアングルを切り替えます。オーディオレベル、トリムイン、トリムアウトなどの機能は、トラックの順番に優先して選択されます。スリップソースボタンは常に再生ヘッド下のクリップに、スリップデストは次のクリップに作用します。その他のスピードエディター機能がカットページでの動作と一致するようになりました。
複数の字幕の改善
例えば、フォントサイズや背景を変更せずに、フォントファミリーやスタイルを変更することができます。SRTでインポートされたHTMLスタイルのリッチテキストは、その後のフォント変更でより良く処理されます。
また、トラックごとに配信ルールを指定し、特定の市場をターゲットにした複数のトラックを設定し、それぞれに独自のCPS、タイミング、ラインルールを設定することも可能です。
トラックスタイルとルールの両方はプリセットとして保存でき、インスペクター3ドットのオプションメニューから呼び出すことができます。
編集タイムラインのコンテキストで新規トラックを追加できるようになりました
コンテキストクリックでトラックを追加すると、新しいトラックがコンテキストクリックしたトラックに隣接して挿入されます。複数のトラックを追加する場合は、新しいトラックの適切な位置がダイアログで提案されます。
編集インスペクタでのFusionエフェクトのメディア入力
メディアプールクリップをFusionのインプットとしてインスペクタにドラッグ&ドロップできるようになりました。Fusionエフェクト、プラグイン、トランジションを作成する際に、メディアインツールを選択し、クリップ名をインスペクタコントロールとして書き出すことで、メディアドロップターゲットを作成することができます。
ネストされた複合クリップのサイズ調整とアルファの統合サポート
マルチカムとシンプルな複合クリップは、子クリップのサイジングとアルファの変更を親タイムラインで適用されるサイジングとアルファの変更と結合できるようになり、基盤となるメディアの解像度を効果的に保持できるようになりました。
新しいResolve FX 空(そら)の置き換え(生成された空のテクスチャを含む)
Resolve FX Sky Replacementは、Bロールや人工的に生成された空のテクスチャを使用したショットのキーイングと空の置き換えを可能にします。テイク間で空の一貫性を保ったり、より適切な背景を提供して色やムードにクリエイティブな影響を与えたりするために使用することができます。
ソーシャルメディアにアップロードする前にレンダリングクリップを確認できるオプション
レンダーキュー3のドットオプションメニューから、アップロード前にレビューする機能を有効にできます。インターネットプリセットを持つジョブは、レンダリング時にディスクにレンダリングされ、アップロード待ちであることが表示されます。ジョブのコンテキストメニューからレンダリングファイルを表示し、品質とコンテンツを確認して、結果をアップロードできます。
マルチユーザーコラボレーションプロジェクトでの個別のタイムラインロック
DaVinci Resolve 18.1では、親ビンの内容をロックすることなく、個々のタイムラインをロックして編集することができます。これにより、マルチユーザープロジェクトにおいて、同じフォルダー内の他のメディアやタイムラインをロックすることなく、メディアプールビンをより柔軟に設定することができます。
メディアプールビンを個別にロックして、その内容を個別に保護することもできます。
再編成され、合理化されたビューメニュー
ビューメニューは、アプリケーション全体に適用されるビュー関連の選択肢にフォーカスしやすくなるよう、合理化および改善されました。一方、単一のページにのみ適用されるビュー関連の選択肢(カラーなど)は、ローカルメニューに移動されました。
ビューメニューは、40以上の項目から25に削減されました。いくつかの項目は階層的な選択肢に移動し、いくつかはパネル固有のコンテキストメニューに他の場所に移動しました。
- カラーページビューアの3ドットのオプションメニューには、ウィンドウアウトライン、ハイライト、ワイプ、スプリットスクリーンなどのオプションが含まれ、以前はコンテキストメニューに隠されていたいくつかの項目が集約されました。これらは、必要に応じてキーボードから操作できるようになりました。
- カラーメニューからスティルオプションとステップタイムラインワイプが利用できるようになりました。
- スマートビンとパワービンの表示は、メディアプールにローカルなので、メディアプールパネルオプションメニューで利用可能になりました。
- Playhead Shadows、Gray viewer backgrounds、2D timeline scrolling は、Preferences > User Preferences で確認できるようになりました。
Dolby Vision シネマトリム
DaVinci Resolve は Dolby Vision XML 5.1.0 フォーマットに対応し、L11 メタデータと同様に Dolby Vision シネマターゲット用のトリムをサポートするようになりました。ユーザーは適切なターゲットディスプレイを選択することで、ホームおよびシネマターゲット用のトリムを作成することができます。
Dolby Vision バージョン 4.0 プロジェクトから 5.1.0 XML をエクスポートする場合、マスタリング カラースペース、アプリケーション タイプ、コンテンツ タイプと目的のホワイト ポイントの L11 値を選択できるダイアログが表示されます。
Fairlight オートメーション カーブの更新
ベクトルベースのキーフレーム、標準ツールによるキーフレームのグラフィカルな入力、編集、トリム、ナッジを含む、オーディオオートメーションカーブの大幅な更新。
- トラックヘッダのオートメーションのドロップダウンメニューから選択できる新しいオートメーション編集ビューで、カーブとキーフレームを管理できるようになりました。キーフレームの追加(Option/Altクリック)、削除(Ctrl-Alt/Cmd-Optionクリック)、個々のキーフレームの選択と移動、キーフレーム範囲の選択、編集、カット/コピー/ペーストが可能です。キーボードショートカットを設定することで、フェーダービューに簡単に切り替えられるようになりました。
- コントロールサーフェスから書き込まれたオートメーションカーブデータが、カーブライン上にキーフレームとして表示されるようになりました。
- キーフレームを移動すると、隣接する任意の2点間でスムーズなランプが作成されるようになりました。複数のキーフレームを範囲内で移動させる場合、範囲外の値を保持するために、自動的に境界キーフレームが範囲に追加されます。
- エリアを選択して上下にドラッグすると、選択したエリアのレベルを瞬時に変更する「カーブアウトトリム」が作成されます。微調整には、Shiftキーを使用します。
- マルチツールフォーカスモードで、shift-alt/shift-optionを押したまま、一時的に鉛筆ツールに切り替えてカーブを再描画します。
- トリミングやキーフレームの調整時にオーバーレイが表示されます。例:”-8.5 dB (∆1.3 dB) “は、絶対レベル値(-8.5 dBfs)と現在のトリム操作の変化(+1.3 dB)を示しています。
- レンジモード選択ツールは不要になったため、削除しました。他のツール(特にフォーカスモードのマルチツール)は、オートメーションカーブビューでキーフレームを選択して操作するために使用できるようになりました。
フェアライトオートメーションモードの更新
オートメーションモードに新しい動作が追加されました。
- オートメーションの値は、プレイヘッドを新しい場所に移動するときに更新されるようになり、オートメーションを記録するときの不連続性を回避します。プレイヘッドがパークされたとき、フェーダーは常に最新に保たれます。
- Fairlight>Automation メニューはいくつかの新しい選択肢を持ちます。
- Write to Start/End/All アクションを選択して、現在のオートメーション・レベルをタイムラインの開始、終了、またはすべてに書き込むことができます。
- Join を選択して、現在のレベルからラッチモードでオートメーションの書き込みを手動で再開します。
- Fairlight>Automation>Active Range を選択し、In、Out、Enable を選択して、オートメーションが書き込める場所を制限することで、オートメーションのアクティブゾーン(ルーラーの上に赤で表示)を設定することができます。オートメーションのプレビューは境界で自動的に切り替わり、アクティブな範囲の前と後の再生と範囲内の録音を可能にします。
- トリミングは、再生を押す前にフェーダーをタッチして保持するか、再生前または再生中にチャンネルのオートメーションパンチボタンを押すことで開始することができます。ボタンが赤くなり、フェーダーキャップが黄色になります。パンチボタンを使用することにより、あるチャンネルではトリミングを開始し、他のチャンネルではトリミングを開始しないようにすることができます。
- ミキサーのオートメーションアームアイコンを右クリックし、Off または Safe を選択すると、トラックごとのオートメーションレコーディングとオートメーショ ン再生を無効にすることができます。
- Fairlight タブのユーザー設定「ミキサーイベントをアンドゥスタックに含める」は、ミキサーアクションを Edit>Undo (Control/Cmd-Z) からアンドゥすることを可能にします。
Fairlight グリッドモード
Fairlight グリッドモードは、タイムコードまたは音楽のテンポに基づいたグリッドにクリップを配置することができます。
- ルーラの上のタイムラインビューオプションの隣にあるグリッドオプションから、グリッドラインの可視性、持続時間、グリッドラインへのスナップなどのオプションをカスタマイズすることができます。
- タイムコードグリッドでは、1秒、1フレーム、1/2フレーム、1/4フレームの解像度を選択することができます。
- テンポグリッドでは、1分あたりの拍数、音符の長さ(1小節、1/2音符、1/4音符、1/8音符、1/16音符)、拍子記号(4/4、3/4、6/8)の設定が可能です。
- ルーラーコンテキストメニューでは、グリッドの開始位置をタイムコードの位置に設定したり、範囲からグリッドを作成したりすることもできます。グリッドの開始位置より前の領域は、負の小節/拍子値で表示されます。選択した時間範囲からグリッドを設定し、テンポが自動的に計算されるように開始点と小節数を設定することができます。
- 音楽テンポのグリッド線には、小節、拍、音符の長さのラベルが付きます。カウンターの位置が “003|03|09 “の場合、グリッドの位置は “小節3、拍3、16分音符9 “であることを示します。
ボイスアイソレーション処理
Fairlightページには、DaVinci Neural Engine AIベースのコアエフェクト処理が新たに追加され、インスペクタまたはフローティングプラグインウィンドウとして表示されるようになりました。この処理では、既存のボイスレコーディングから大きな音や望ましくない音を除去することができます。文字通り、録音から削岩機を取り除き、音声だけを残すことができます。ボイスアイソレーションは、エアコン、交通渋滞、発電機やモーターの音、エコーや残響音、望ましくない部屋の音、その他の背景音など、一般的な目的の騒音や部屋の音の低減/除去に非常に効果的です。
ボイスアイソレーションエフェクトは、2つのフェアライトトラックエフェクト(もう1つはダイアログレベラー)のうちの1つで、インスペクタからアクセスできます。オーディオ」タブでは、フェアライト、編集、カットのページで、選択したモノラルおよびステレオのクリップとトラックに対してボイスアイソレーションを有効にすることができます。トラックについては、フェアライトミキサーのトラックFXセクションから有効にすることもできます。
- 効果のオン/オフと「量」のコントロール(0〜100%)の2つがあります。100%より少し少なめに使用すると、より自然な仕上がりになります。
- モノラルおよびステレオのトラックおよびクリップのエフェクトとしてサポートされています。
- ライブオーディオ入力は使用できませんので、音源はディスク上にある必要があります。
- 注:ボイスアイソレーションは、人の声以外には適さず、主にダイアログ処理に有効です。
Fairlight FX ダイアログレベラー
ダイアログレベラーは、面倒なレベル調整(クリップゲインやオートメーションカーブ)や圧縮や膨張のアーティファクトを必要とせずに、ダイアログレコーディングを非常に有用に改善することができます。
部分的にオフマイクになっている台詞や、複数の人物が異なる音量で登場する台詞、レベルが極端に異なる台詞などにダイアログレベラーを使用すると、元のバランスの視点を維持したまま、極めて均一で自然な結果を得ることができます。全体的な効果として、本来は飛び抜けていたり、聞き取れないに近いダイアログレベルが、最終的なミックスの中でうまく収まるようになります。
ダイアログレベラー(ボイスアイソレーションエフェクトと同様)は、FairlightミキサーのインスペクタとトラックFXセクションから有効にすることができます。
ダイアログレベラーのコントロールは以下の通りです。
- オン/オフスイッチ
- 異なるダイアログタイプに最適化された4つのプリセット。デフォルト(「ほとんどのソースを最適化」)は、ほとんどの素材に対応します。
- 3つのモジュールスイッチにより、ソース素材に応じた反応をさらに調整できます。
- 最大6dBのゲインを設定できる出力レベルコントロール。
プレインストールに関する注意事項
- PostgreSQL 9.0は最小サポートバージョンです。
- PostgreSQL 13を推奨します。
- WindowsとLinuxの10bitビューワーは、高性能なグラフィックカードとディスプレイが必要です。
Mac OSの最小システム要件
- macOS 11 Big Sur
- 8GBのシステムメモリ。Fusion使用時は16GB
- Blackmagic Design Desktop Videoバージョン12.0以降
- 2 GB以上のVRAMを搭載した統合GPUまたはディスクリートGPU。
- MetalまたはOpenCL 1.2に対応したGPU。
Windows 10 Creators Update。
- 16GBのシステムメモリ。Fusionを使用する場合は32 GB
- Blackmagic Design Desktop Video 10.4.1またはそれ以降
- 2 GB以上のVRAMを搭載した統合GPUまたはディスクリートGPU
- OpenCL 1.2またはCUDA 11に対応したGPU
- NVIDIA/AMD/Intel GPUドライバのバージョン – GPUの要求に従ってください。
Linuxの最小システム要件
- CentOS 7.3
- 32 GBのシステムメモリ
- Blackmagic Design Desktop Video 10.4.1またはそれ以降
- 2 GB以上のVRAMを搭載したディスクリートGPU
- OpenCL 1.2またはCUDA 11をサポートするGPU
- NVIDIA/AMDドライバのバージョン – GPUの要求に応じて
MacにDaVinci Resolveソフトウェアをインストールする
DaVinci Resolve Installerアイコンをダブルクリックし、画面の指示に従います。システムからDaVinci Resolveを削除するには、Uninstall Resolveアイコンをダブルクリックします。
WindowsにDaVinci Resolve Softwareをインストールする
DaVinci Resolve Installerアイコンをダブルクリックし、画面の指示に従います。DaVinci Resolveをシステムから削除するには、プログラムと機能のコントロールパネルでDaVinci Resolveを選択し、アンインストールをクリックし、画面の指示に従います。
WindowsでレガシーフェアライトプロジェクトをDaVinci Resolveに移行する
レガシーFairlight DR2プロジェクトをDaVinci Resolveにインポートするには、次のユーティリティをWindowsシステムにダウンロードしてインストールします: downloads.blackmagicdesign.com/DaVinciResolve/Fairlight-Project-Importer.zip ユーティリティをインストールしたら、DaVinci ResolveのFairlightメニューに「Fairlightプロジェクトをインポート」というオプションが表示されているはずです。
LinuxにDaVinci Resolveソフトウェアをインストールする
DaVinci Resolveインストーラーをダブルクリックし、画面の指示に従います。DaVinci Resolveをシステムから削除するには、インストーラーを実行した後、アンインストールオプションを選択します。
www.DeepL.com/Translator(無料版)で翻訳したのもを一部修正しています。
データベース管理に関する重要なお知らせ
DaVinci Resolve 18.1を使用するには、DaVinci Resolve 18.0.4以前のバージョンを利用されている場合は、プロジェクトライブラリ(データベース)のアップグレードが必要です。18.1にアップグレードする前に、既存のデータベース(DiskDBとPostgreSQLの両方)をバックアップし、アップグレード用にそのデータベースを復元することを強くお勧めします。
Blackmagic Cloudをご利用の場合も同様です。Blackmagic Cloudのプロジェクトライブラリをアップグレードできるのは、対象のプロジェクトライブラリの所有者のみです。
#ダビンチリゾルブ ♯DaVinciResolve
