Question
デリバー時にフレームレートを変更できません。変更方法はありますか?
Answer
DaVinci Resolveは、一度、設定されたタイムラインのフレームレートの変更はできません。また、タイムラインのフレームレートが、デリバー時(エクスポート時)のフレームレートに設定されます。
このため、 DaVinci Resolve で一度作成したタイムラインのフレームレートを変更する場合は、希望のフレームレートのタイムラインを新規作成して、そこに既存のフレームレートのクリップをコピーします。
手順は次の通りです。
メディアプール上の何もないところで右クリックして[タイムライン]-[新規タイムラインを作成]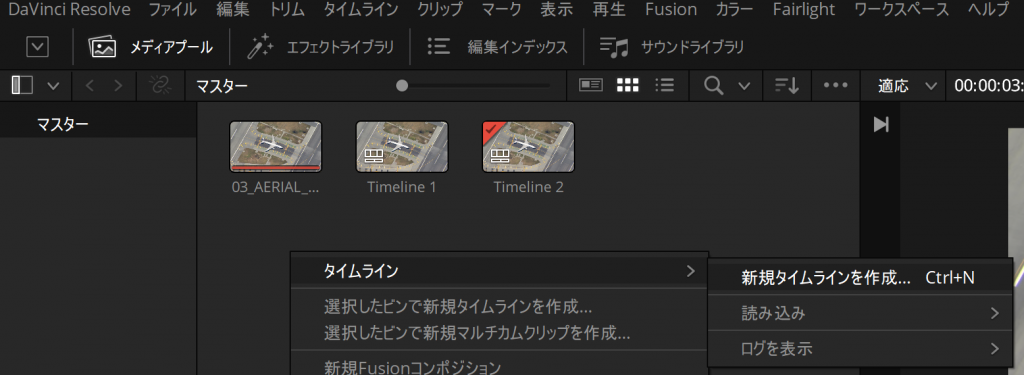
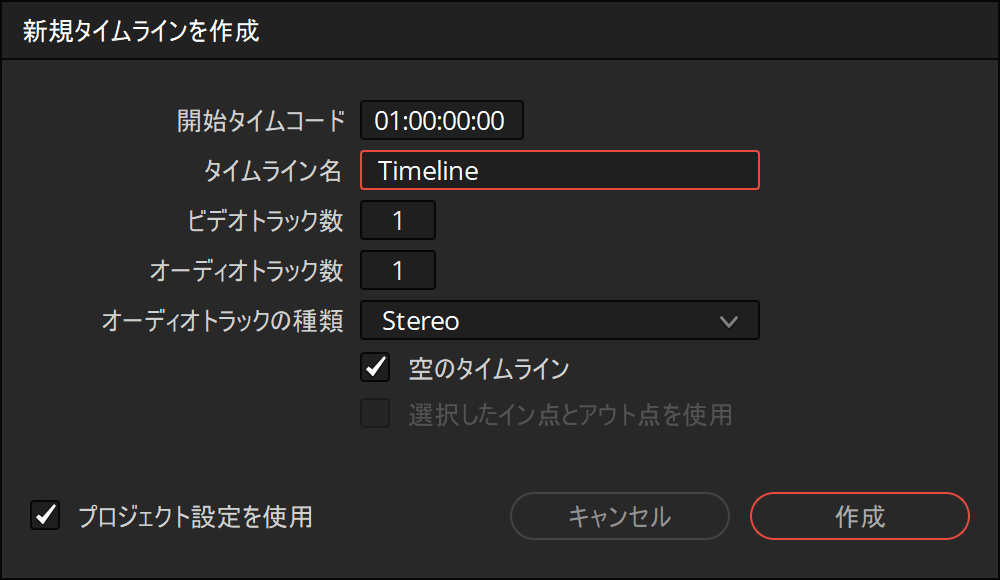
「プロジェクト設定を使用」のチェックを外す
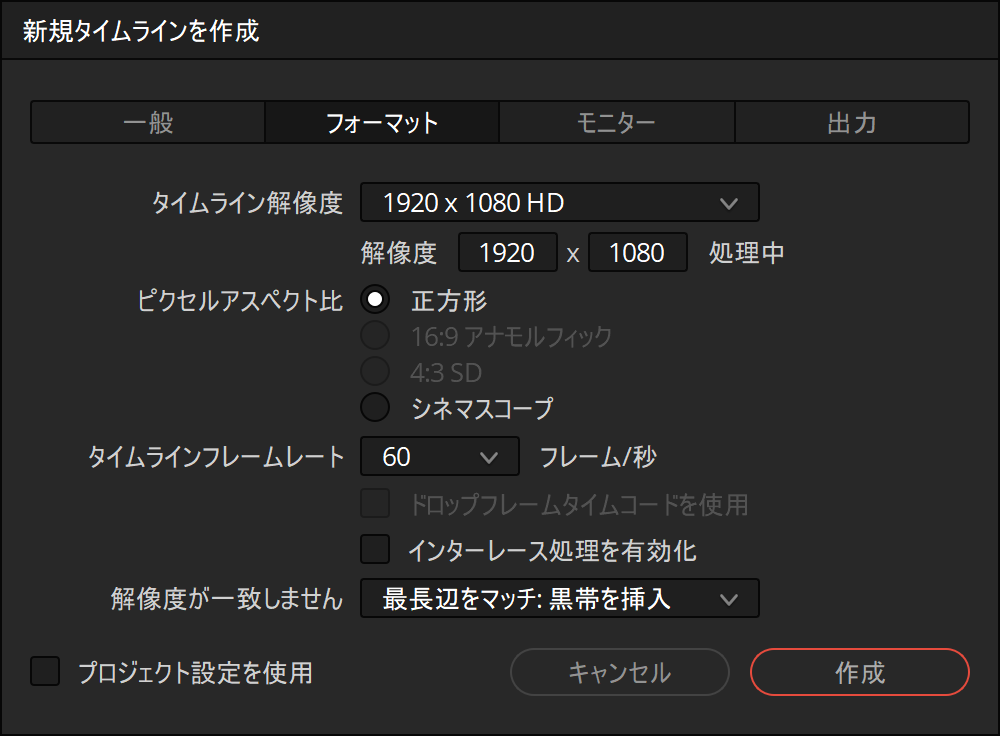
「フォーマット」の「タイムラインフレームレート」で希望のフレームレートに設定して、<作成>
変更したい元となるタイムラインを開いて、タイムライン上のすべてのクリップを選択して、「Ctrl+C」でコピー
変更先となる作成したタイムラインを開いて、「Ctrl+V」でペースト
これで、新しいフレームレートでデリバーする最低限の準備は完了です。
フレーム不足分を滑らかにする
新しいフレームレートでデリバーができるようになっただけで、変更前のフレームレートからの不足分のフレームを複製しただけです。結果としては、滑らかな表示は期待できず、また、変更しているフレームレートによっては、カクつきが酷くなる場合もあります。
素材のフレームレートと異なるフレームレートのタイムラインにする場合、特に素材よりも高いフレームレートにした場合(例:30fps->60fps、24fps->60fps)ここまでに記載した内容では、カクついて見えたり、フレームレートを挙げても見た目が変わらない場合があります。これは、新しいフレームレートで不足しているフレームが足りていないために発生しています。
(正確には、後述している [ファイル]-[プロジェクト設定]の「マスター設定」の「フレーム補完」 の設定によって処理が変わりますが、デフォルトでは、ここに記載の通りに不足フレームを複製する「ニアレスト」が利用されます。)
30fps->60fpsの例では、2フレームごとに同じフレームが複製して利用されるため、フレームレートを上げているにもかかわらず、何も変わっていません。
24fps->60fpsの例では、2.5フレームごとに同じフレームが複製して利用され、整数倍でないことからカクついて見えてしまいます。
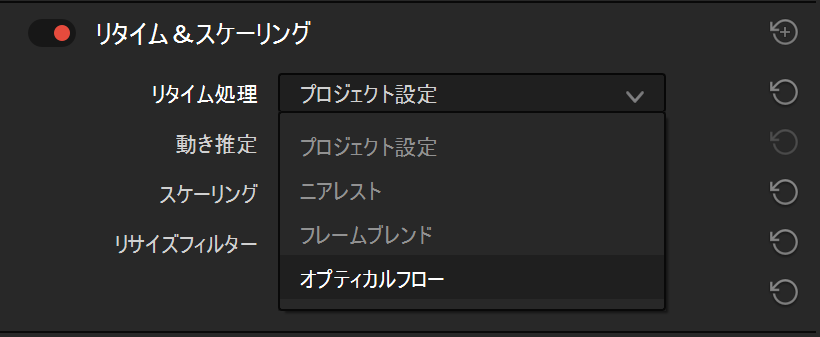
この問題を解消するには、リタイム処理を行って、不足しているフレームを補完することをお勧めします。
カット/エディットページでタイムライン上のフレームを補完するクリップを選択し、「インスペクタ」の「リタイム&スケーリング」で実施します。
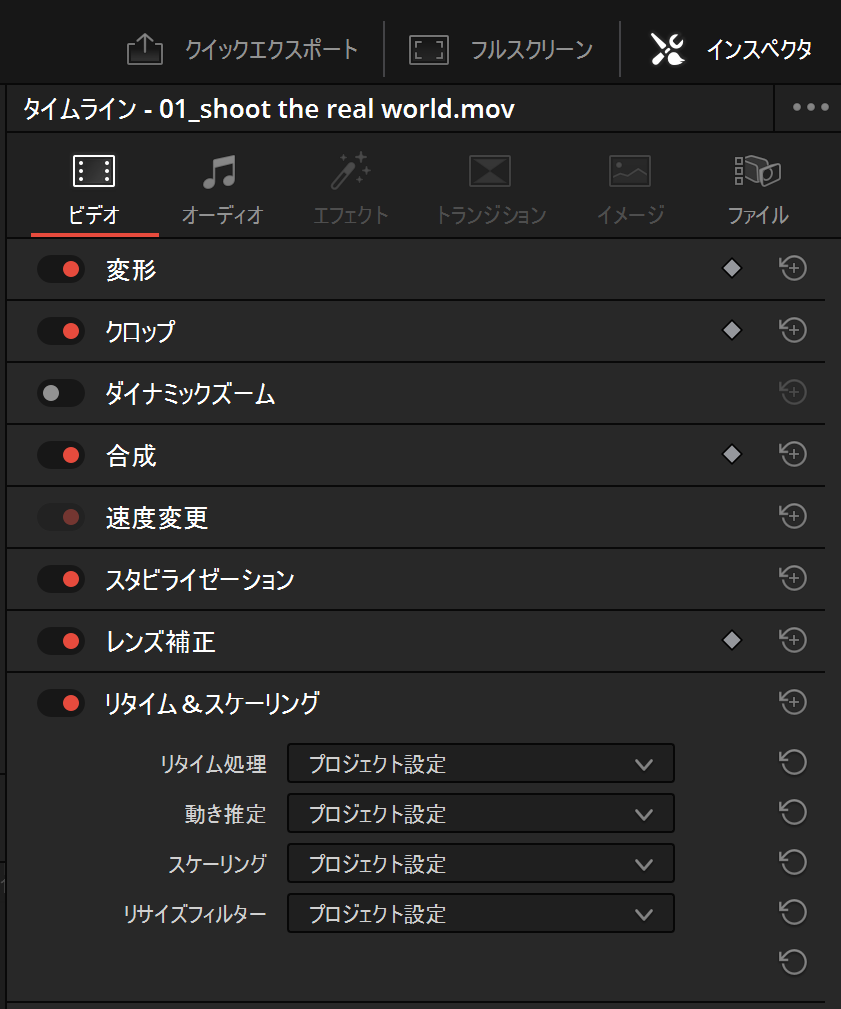
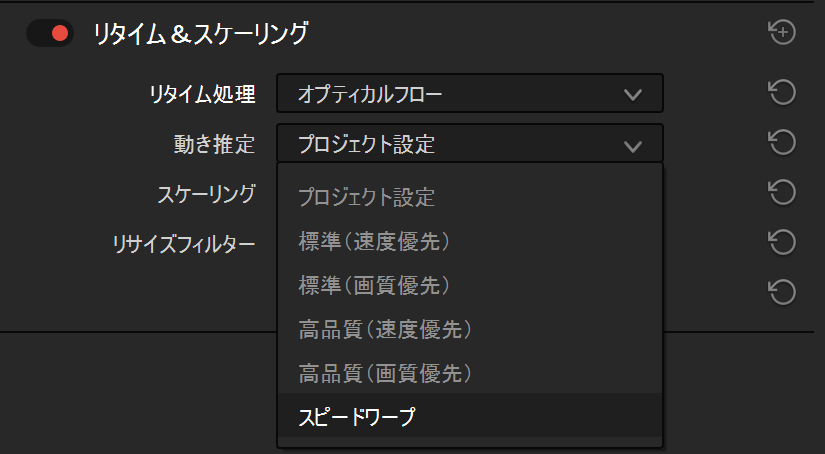
一番高品質になるのは、リタイム処理で「オプティカルフロー」を選択し、動き推定で「スピードワープ」を選択したものです。「スピードワープ」 の利用は有償版のDaVinci Resolve Studioが必要です。無償版を利用されている場合は、その他の「高品質(画質優先)」をお試しください。
処理には時間がかかります。特にスピードワープは不足するフレームの前後から、新しいフレームをAIで作成するので、かなり時間がかかります。
なお、デフォルトの「プロジェクト設定」は、「プロジェクト設定」の設定を適用するという意味です。デフォルトでは、リタイム処理がニアレストになっており、単純に不足しているフレームに近いフレームが複製されています。[ファイル]-[プロジェクト設定]の「マスター設定」の「フレーム補完」から変更できます。

なお、タイムライン作成時の初期のフレームレートはプロジェクト単位で決まっています。[ファイル]-[プロジェクト設定]の「マスター設定」で設定変更が可能です。いつも決まった解像度やフレームレートを利用される場合は、 [ファイル]-[プロジェクト設定]の 「プリセット」を利用して、カスタマイズしたプロジェクト設定を保存して再利用することも可能です。
Fusionコンポジション(「テキスト+」を含む)のキーフレームのストレッチ
Fusionコンポジションやテキスト+のキーフレームの位置が新しいフレームレートに合わせてストレッチされません。
なお、テキスト+の実態は、Fusionコンポジションにテキスト+ノードが追加されているFusionコンポジションなので、以降はFusionコンポジションとして説明します。
これは、Fusionのキーフレーム機能が、「フレーム」単位での処理となっていることをに起因しており、フレームレートの異なるタイムラインにコピーした場合、フレームレートに合わせたストレッチ処理は自動では実施しません。
いくつか方法はあるかと思いますが、最も簡単な方法は、Fusionコンポジションで利用しているノード構成のノードの並びの最後に当たる「メディア出力(media out)」の直前に、「タイム速度(Time Speed)」ノードを追加していただき調整いただくのが良いかと思います。
「タイム速度(Time Speed)」ノードインスペクタにある「速度」でFusionの処理の全体のタイミングを伸縮できるので、24→48となる場合は0.5に設定ください。
また、デフォルトで補間モードが「ブレンド」になります。
ブレンドの場合、前後のフレームを足して1/2にした状態になるので、ブレが大きく見えるかもしれません。
「2フレームごとに同じフレームが複製して利用される」を再現するには、「ニアレスト」をご利用ください。
簡単ではありますが、次の通り簡単な説明の動画を作成いたしました。こちらを確認ください。
2023/03/06
「Fusionコンポジション(「テキスト+」を含む)のキーフレームのストレッチ」 を追加
♯fps